Beginners and veteran artists alike have a big task in front of them when looking to pursue illustration with traditional media. There are so many choices when it comes to drawing supplies – what works best? Everyone will have their preferences and I am no different!
This guide showcases my favorite, most-used supplies I use throughout my art practice. I generally use ink and graphite media equally, sketching with both and completing more finalized pieces as well. My hope is that you’ll find some new favorites to add to your toolkit.
Pencils

When I look back through my history of drawing, more pieces have been completed using Staedtler Mars Lumograph pencils than any other mark-making tools – and for good reason! These are manufactured in a variety of levels from very soft 12B to a very hard 10H. I have found them to be smooth and durable for all sorts of applications big and small.
I tend to stick to the middle tones for most work these days – anywhere between 3H and 3B with a sharpened B being a nice choice for initial marks on a page (I prefer a chisel point versus other styles of sharpening). The only drawback of the more softer tones from 4B onward is how shiny they can be on a page, particularly on smooth paper. The quality of Staedtler pencils is quite consistent in my experience and allow themselves to be pretty easily blended as well.

Faber-Castell brought out the pencils pictured above around 2021-ish (I believe) and they are an excellent complement to the Staedtler Mars Lumograph pencils. The core of the Graphite Matt pencils differs from other pencils and produces a more matte finish as their name implies. They create a much deeper dark tone than most other “normal” graphite pencils can make. There is a little bit of shine with these (especially when pressed hard into the paper) but is a lot less noticeable.
These have been very effective for portraits where there are areas of opaque black, such as with the eyes and nose in the below portrait of Bailey:

A bit more expensive than other pencils, I would still recommend these if you’re looking to stick within the graphite world and want to avoid charcoal.
Graphite artwork characterizes a lot of my past work and these pencils have really helped me get there. You can check out a selection for sale on my Etsy shop if you like!
Blending
Easing pencil marks together to make a blended shade is a core part of many graphite pieces. I prefer to use a mixture of both blending stumps and tortillons of varying sizes to get that smudging just right.

I’m less choosey about the brand here and grabbing a pack of different sizes is a great place to start. The larger, two-ended blending stumps are used more often at my studio though I find the smaller, “sharper” tortillons appropriate for very small areas that the need a darker blend. Tortillons can be cleaned by removing layers of their paper while stumps can be cleaned via sandpaper or other similar means. Keep some of the dirty ones nearby! They can save some time when you need to start with a very soft tone or gray spot in a composition as opposed to starting with a normal pencil mark.
Erasers and Accessories

Staedtler comes through yet again with their Mars plastic erasers. These do a fine job of erasing large areas without damaging the surface. I like how they don’t smudge too much either. Will you be able to erase a 14B mark down to the absolute white of the page? Nope. However, they have served me well in eliminating sketchy lines without any fuss at the beginning stages of a drawing.
The Tombow Mono Zero eraser stick is a retractable tool and one I’d consider essential for anyone working in graphite. It offers a precision and control to erasing that is unmatched in my opinion. It is a wonderful ally in creating small highlight areas as well. I also pack along a small pair of sewing scissors in my kit to shape the end of the Tombow eraser if I really need a sharp point or to simply find a fast way to start with a clean portion of the eraser. Be careful when cutting it as a very sharp eraser can scratch up the paper if used with too much force. Most Tombow Mono Zeroes are sold with an extra spare eraser stick in a clear cartridge-like container.
A kneaded eraser from General’s is a good one to have on hand as well. Molding and shaping it allows for a good amount of flexibility and picks up small traces of graphite from the paper for a slight lightening of a given area. I like storing my current kneaded eraser in a tiny Rubbermaid container to keep it from picking up dust and other debris in my travel kit.

I use a soft round watercolor brush to wipe away eraser shavings. This is a good practice to get into, particularly on very refined spots on the composition that have a lot of final details in place.
A lot of artists will typically use sandpaper, a knife, and other tools to sharpen their pencils and get a good amount of graphite exposed. This makes sense if you use it softly with broad strokes at a side angle. For myself, I prefer a good old-fashioned sharpener with a compartment for shavings and don’t mind resharpening more often. The Faber-Castell 9000 is a good one to go with. They are compact and have a couple of pencil sizing options.
Pens and Ink
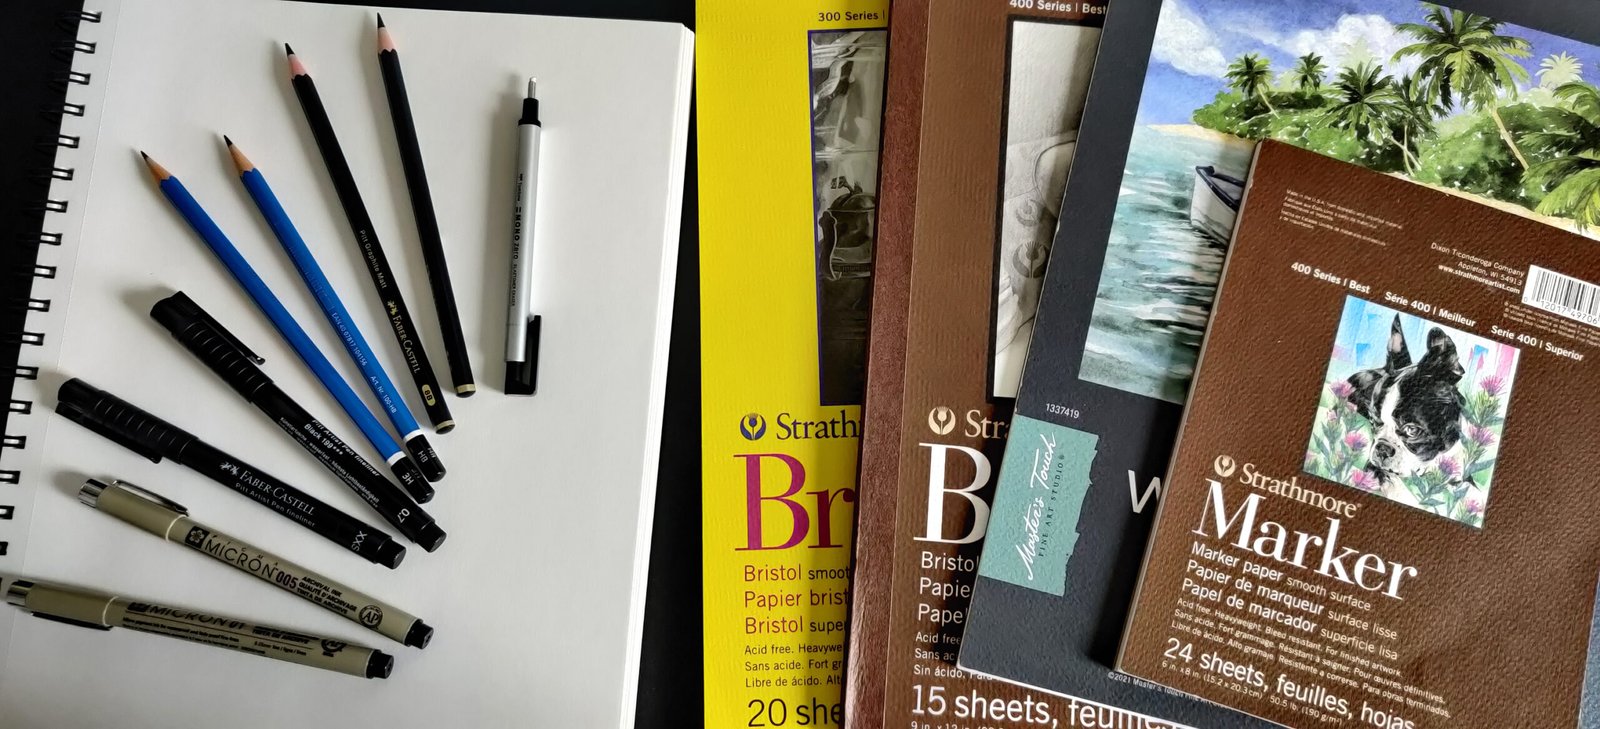
I’ve gravitated towards pigment liners for my inkwork since I tend to draw on location often. I’ll typically pack two different brands with me: Sakura Microns for the small details and loose sketches and then the Faber-Castell Pitt Artist Pens for larger areas and outlines.


The finer points/nibs provide strong pigmentation. Both brands are smooth and are less prone to choppy marks than others I’ve used. However, I would recommend buying them in sealed packs and using what you have in a two-year period. Store them horizontally to keep them from settling too much. I like to shake mine slightly before starting a new session.
Paper
Last but not least is the paper! Strathmore is the undisputed champion in my book, creating a wide range of good quality papers for all scenarios.

The 300 series Bristol (yellow label) is a good one to start with and I find it’s very effective for final work too. I prefer the smooth finish, especially for ink or graphite portrait work. The 400 series Bristol is also very nice but a bit less forgiving to scratches or heavy erasing. It’s the sort of paper I like to use for projects where I want just a bit more of a fine-grain feel. The Strathmore sketching and drawing paper are good picks for practice.
The 400 series Marker paper is also a winner and does exactly what it needs to do for ink-based art. I also find that it’s really effective for when I want to use a lightbox.
Other paper I experiment with is hot press watercolor paper. I’m surprised by the quality of the Hobby Lobby Master’s Touch house brand and it’s been wonderful when going after nature or other subjects where heavy textures and lots of dark areas are necessary.
Conclusion
Do you need all of these things to make a great piece of art? Nope! However, having some quality materials on hand will make it a bit easier to create the next masterpiece. If you’re just getting started, I would recommend going with a kit that that contains a range of graphite pencils from at least 2H to 6B, some blending stumps, a kneaded eraser, and a Staedtler Mars plastic eraser. Combine that with some drawing paper and you’re ready to go!
Keep telling stories,
Jeremy